Three Ways to Make Cider at Home, Part 2: Apartment Therapy Edition October 16 2019
I'm lucky enough to live in a hobby farm-type situation just outside Portland, though that hasn't always been the case. Now, I have space for both my own apple trees and a small cider press.
But if you want to make cider from apples – and you absolutely should – and you live in an apartment ... I have an option for you, and you won't have to spend all your rent money on it, either.
Why Make Cider from Apples?
In my previous post, I outlined an extremely simple way to make cider at home that began with buying fresh juice from a local orchard or even a well-stocked grocery store. What that method saved in time and equipment, it lacked a little in both creativity and control. When you buy cider already pressed, you're usually missing some critical information:
- What kind of apples are in it? There are literally hundreds of varieties of apples available, but already-pressed cider tends to come from eating apples - the kinds you'd see at a supermarket under fluorescent lights. It's generally made from whichever of the orchard's apple varieties that didn't quite make the "pretty enough to eat" cut - totally fine if you're going to heat it up with cinnamon sticks and bourbon, but for making fine cider, you might want a little more creative control, selecting apples with a good balance of tannins, acids and sugars.
- When were the apples pressed? Believe it or not, some "fresh cider" might have been frozen and unfrozen from last year's harvest. If you've ever wondered how you're finding 'fresh' cider in May, here's your answer!
- What is its sugar content/acidity/etc.? These things can all be measured once the jug is opened, of course, but I like to know what I'm buying. If you press your own, you can literally bite an apple to get a sense of what kind of juice you'll get. The grocery stores I shop at tend to frown on opening a gallon of cider for "sampling purposes" before paying for it!
"So, How Do you Press Apples at Home, Dave?"
Obviously, you could buy (or make) a press. Most people don't have space for bulky equipment that is used just once or twice a year (like that rowing machine, amirite?). Many homebrew stores have presses and grinders that you can rent, but you should call at least a couple of weeks in advance to reserve time. During harvest season, presses can be in high demand.
But I have another method I think you'll like, both for convenience and cost.
The juice craze of the early twenty-teens has resulted in a lot of juice machines finding their way to secondhand stores. My local Goodwill had three on the shelf when I looked last week, all under $20. These make perfectly good juice for the home kitchen, and don't take up a ton of space.
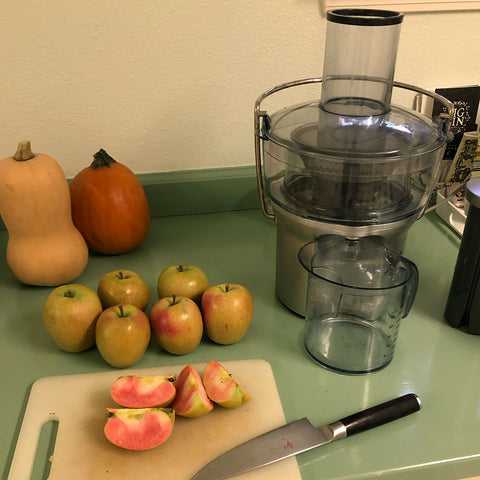
I'm using Mountain Rose apples from my local supermarket which have a distinct rose-colored flesh. Their juice is also rose-colored, unlike what you'll find in the plastic jugs at most supermarkets, and at least one cidery nearby has made award-winning, single-varietal cider with its juice.
Simply quarter the apples, flip on the juicer, and shove them in. It's definitely a slower process than a big press, but I was able to make a gallon of beautiful-looking juice in just under 30 minutes.
Measuring Twice is Nice
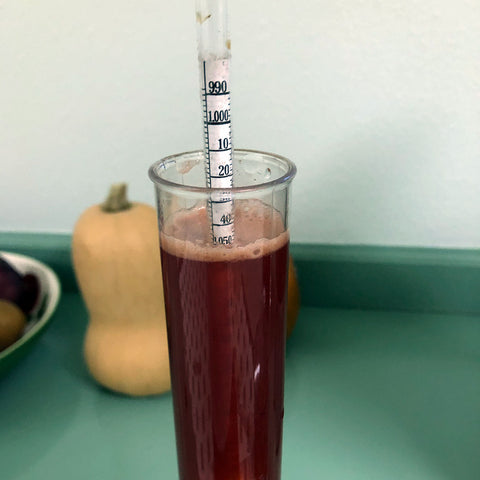
Once you have enough juice in the pitcher, fill a hydrometer with some sample juice. Hydrometers are a way to measure the sugar content of juice, which will tell you a bit about its potential alcohol content. They're available at any local homebrew store for under $20. (Pro tip: buy a cheap one if you are clumsy, because you will break it. I think I am on my fifth one!) I had to let mine settle for a few minutes as the juicer had aerated the juice quite a bit, making it difficult to float the hydrometer initially.
This juice came in at around 1.050 in the "specific gravity" (aka "SG") measurement system. There are other scales (Brix is common among winemakers), but either will work just fine. The inside front cover of 33 Cider Pressings includes conversion tables between Brix and SG, as well as a table to calculate potential alcohol based on your pre-fermentation and post-fermentation readings. Not to spoil the ending, but your final gravity, or "FG," is likely to be 1.000 or even a little less. Yeast really, really like the simple sugars of apple juice, and will eat all of it if you let them.
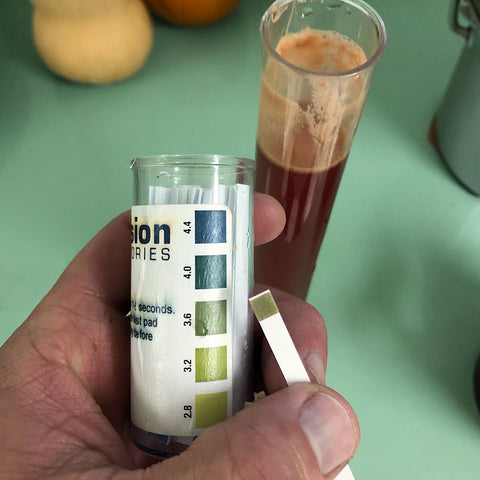
But before we pitch yeast, let's take one more measurement. We're going to measure pH, which is another system for measuring our cider, this one describing how acidic the juice is to start. You can buy an electronic tool for this, but I find I use the inexpensive pH test strips from the homebrew store just as frequently, and they never run out of batteries. This juice weighed in at 3.5, which is a little on the acidic side, but totally acceptable.
I won't get into the science, but this is useful data to have should:
- something start to go off in fermentation like a transformation into vinegar (pH will drop as acetobacter convert alcohol to acetic acid), or
- you decide you want to correct the cider to make it more or less acidic to taste by adding acid of some sort later in the process. I am a low chemical intervention-type person philosophically, but you can read up on citric and malic acid additions if this idea is interesting to you.
I'm making a single-varietal cider here, but if you are making a blend, you could achieve a target pH by selecting a good balance of both low and high-acidity apples.
Dump, (Pitch) and Stir ...
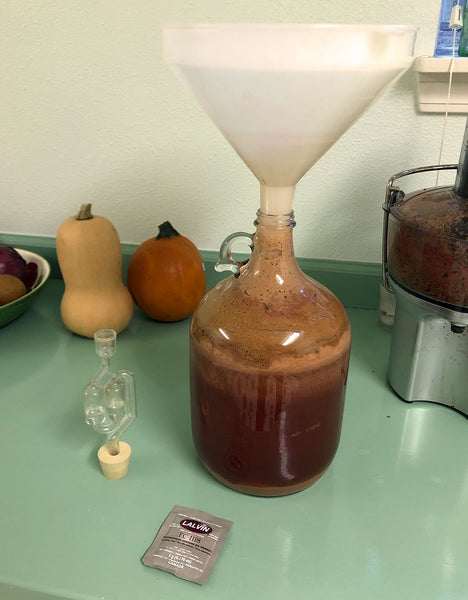
The rest of the process is very similar to the beginner cidermaking instructions I posted previously, but in this case, you'll perhaps want to supply your own fermenter, which is a fancy name for some kind of container you can both seal and sterilize.
You could absolutely use the plastic milk jug as before, or you could upgrade things and purchase a 1-gallon carboy from that aforementioned homebrew store. As long as you don't drop it, you can get years and years of good use out of it, and it's very easy to clean and accessorize. Mine is accessorized with a rubber stopper and airlock (from the homebrew store) which would also fit a larger 5-gallon size.
If you sourced your apples from a store, you'll want to pitch a commercial yeast. Dried packets work great here as before, but I'd go with a wine yeast, which tends to let the flavor of the apples show through more than a beer yeast does. You've gone to all this trouble, why cover it up with yeast-derived flavors? We're not cavemen here!
If you sourced your apples from a friend's orchard, or foraged them from a tree someplace ... you could go for natural fermentation. This is a much riskier proposition - not necessarily from a health standpoint - but from an effort wasted standpoint.
I have always had good luck with natural fermentation, which uses the yeast already on the apples' skin to promote fermentation. However, it is a gamble, and it is possible that the yeast on your apples is either too funky or too weak to ferment the juice before other microorganisms get to it, increasing your chances of a gallon of vinegar, or more likely, a foul-tasting and/or -smelling drain pour. 99.99999% it wouldn't kill you, but as lawyers like to say ... it's on you, bub. Take your own chances.
Next up - Part 3 of making cider at home, from apples ... so, so, so many apples!


